Batch Processing allows you to apply a set of shipping characteristics across multiple addresses and shipping labels.
• All items within a batch typically share the same profile – (i.e. same box/envelope size and weight; extra services). The only difference is the “ship-to address”. • Batch Processing improves efficiency by automating repetitive tasks. • Batches are tracked through a unique ID that is created within Neoship ADVANCED.
Neoship ADVANCED supports:
• Up to 100 shipments per batch • Unlimited number of batches
Procedure
How To Create A Batch:
The “Ship From” field is used to identify the return address of where the item is being shipped from. Using the drop down menu, select the appropriate “Ship From” address. For this example “MAIN – NEOPOST USA” will be chosen.
The “Packaging Type” field is used to select the type of packaging the item will be shipped in. Using the drop down menu, select the package type. If the package type you are looking for is not available in the drop down, simply create a new package type by selecting “Define Customer Package Type”.
When creating a new package type, you have to enter the following information: • Dimensions and weight of the package • Short description of the package • Assign the package a default mail class and optional extra services • Visibility of package
For this example “Package Any dimension < 12” will be chosen.
Place the item you are shipping on the weighing platform. Click “GET WEIGHT”.
The weight is now displayed.
To create a “batch” you will first have to select existing addresses from your Address Book. Each batch can consist of up to 100 addresses. Select “Multiple Shipment”. Click “CREATE BATCH”.
To add addresses to a batch, click the “<” button next to the address that you would like to add. The address will move under the “Batch Addresses” heading. Once you have added all applicable addresses, click “CONTINUE”.
Under the “Shipping Services” column, click “GET RATES”. All applicable rate classes and extra services that can be applied to the items being shipped will be listed here.
Once you have selected all applicable extra services, click “CALCULATE TOTAL POSTAGE” to review the total cost for all items being shipped within the batch.
To view the individual break down of each item within the batch shipment click the “+” sign.
Before printing the shipping labels, click on the “gear” icon to verify or set your printing preferences such as: • Printing device • Type of printer • Label default
You are now ready to print the shipping label, click “PRINT SHIPPING LABEL”.
A refund can be initiated during the 24 hour period after the shipping date when a shipping label was created and printed in error. NOTE: You can cancel the shipment on the day the label was printed. • When applying for a refund, the User will receive 90% of the postage value back. • When cancelling a shipment, the User will receive 100% of the postage value back.
As soon as the User applies for a postage refund, their Quadient Postage Funding® account will be credited for 90% of the postage value. Once a label has been printed, you have 1 business day to request a refund. NOTE: it is 1 business day from the mailing date printed on the shipping label.
The refund is by funds that are credited to the Quadient Postage Funding® account. You cannot receive funds in any other format.
Refund requests are not always approved. The USPS® researches each refund request. If the refund is considered false or fraudulent, it will be rejected. The refund amount will be reversed within the Quadient Postage Funding® account. This process can take up to 45 days.
The system will allow a User to cancel a completed shipment before 10:00 PM central time, the day the label was printed. • Cancelled shipments will not be charged to the User’s Quadient Postage Funding® account. • Users will be warned that the cancelled shipping label is to be destroyed. However, if a cancelled shipment label is ultimately scanned by the USPS® in the mail stream, their Quadient Postage Funding® account will automatically be charged for the original amount of the shipment.
Upon cancellation of a shipment, the status of the shipment transaction will be updated to ‘Cancelled’. The User ID and time/date stamp of the cancel event will be saved with the transaction history.
The User will be presented with three (3) choices when cancelling a shipment: • Create an identical shipment with a new tracking number. • Modify one or more of the shipment details before creating a new shipping label with a new tracking number. • No new shipment to be created.
At the conclusion of each shipping day, the ‘CANCEL’ button will be removed from the transaction history display. Customers will retain the option to request a refund of 90% of the package total for the remainder of the 24 business hours packages are eligible for refunds.
Procedure
Select “Shipping History” from the HISTORY drop down menu.
In the “Refund/Cancel” column, select “CANCEL”.
Once the cancellation is initiated, a pop up message will appear alerting you to destroy the label and not to induct it into the mail stream. If you do induct the label into the mail stream after requesting a void you will be charged for the postage on the label. You have the option to accept or not accept these terms and conditions. As soon as the cancellation is initiated, 100% of the funds will be replenished into the Quadient Postage Funding® account.
Note: To view a cancelled shipment, select “Shipping History” from the HISTORY drop down menu and on the SHIPMENT LIST page click on “Filtering criteria”. Select “Cancelled” from the Cancelled drop down menu and click on the “FILTER” button.
Look out for an activation email from noreply.cps@kyocera.biz .
Click the activate now button in that email to set up your password.
Username and Password
During the Activation, your username will display in the first box.
Follow the prompt to set up your password and hit Save.
Log In to KCPS
Pin Number
Your pin number will be emailed to you after initial activation. Keep this number handy! This number will be used to release your print jobs at the machine.
After you install the application on your computer, you’ll now see Kyocera Cloud Print and Scan asa new printer option.
Choose Kyocera Cloud Print and Scan as the printer from your computer. You will need to enter your username and password in the KCPS app if you are not logged in.
Go to the copier where you want to print your documents and log in to KCPS.
DO NOT ENTER USERNAME
Log in using your pin number ONLY on the number pad. Then hit the “Login”button.
Please use the “C” for Clear on the keypad to delete any failed attempts. It will not auto clear the last PIN input.
Select the KCPS icon. The KCPS menu displays.
Select Print.
Select one or more documents from the list displayed.
Select the printer icon when you are finished selecting documents.
Set any print options you want to apply to all your documents. If print policies are in effect, some choices are unavailable.
Select Print
All the print jobs you selected are printed using the print options you set.
Download the Kyocera Mobile Print App from the Play/App Store.
Once Downloaded and Opened, Tap the Icon on the Bottom Right with a cog wheel.
Scroll to the bottom where it says Kyocera Cloud Print and Scan and tap on it.
Enter the following information:
Domain Name : cps-us.kyocera.biz
Organization Name : Your Organization’s Name (eg. Chase Bank LLC)
Username and Password are the same from the KCPS app and website.
After you enter the information tap the slider icon. For Androids hit “OK”.
On iOS be sure to tap the done option in the top right or it won’t save it.
Now if it says Kyocera Cloud Print and Scan at the bottom, now you’re all set.
Important to remember that any desired print must be downloaded to your phone and accessed through the Kyocera Mobile Print app to print it through KCPS.
To set up smb scanning you will need to access the Control Center of the copier by putting in the IP address of the printer into the address bar of your chosen web browser.
If you do not know what the IP address of your MFP is you can get it from the Status Page.
First we need to set up a shared folder. Start by right clicking on your desktop. Select new and then select folder.
You can name the folder however you see fit. I recommend using “Scans”. Once named right click on the folder and select Properties
Click The Sharing tab
Click Share
In the box Type Everyone and select Add
Once Added right click on everyone and select Read/Write
Click Shared Then Click Done
On this screen make not of the network path. The name between the first set of \ is the Host name. we will need this later. Everything after the host name we will also need. You will also need everything after the \ Now click Advanced Sharing
Make sure the share this folder checkbox is selected and click apply.
Now we need to get the ip address for your PC and the Host name click on your start button on the bottom left corner and type cmd and press enter
once open type ipconfg /all you near the top of the text you should see the Host Name and under ethernet adapter you will see your IP address
now we need to open your preferred web browser and type in the IP address of the printer. If this is your first time using the Command Center it will say the connection is not private depending on your web browser you will need to allow the connection. I am using Google chrome. Click the advance button and click proceed
Depending on the model of your printer your page might look slightly different than the one below, these directions will work the same. You should now see the command center page. On the right hand side you there are several options. click Address Book and a Drop Down will appear. Click on Machine Address Book and then click Add
Now we will type in all the information you had gathered previously
For Name type in the name you want to appear on the printer. under SMB put the Host Name under host name. You can also use your IP address. I would only use the IP address if the host name does not work and you have a static IP address set.
Leave Port Number
Path from the network path we obtained when we shared the folder.
Login user name and password is your Windows log in. If you are using a Microsoft or Office 365 account this will be your Microsoft Email login and password.
IMPORTANT IF YOU EVER CHANGE YOUR LOGIN PASSWORD YOU WILL NEED TO CHANGE IT HERE AS WELL OR IT WILL STOP SCANNING!!!!!!!
Click Submit at the bottom and you are now ready to scan
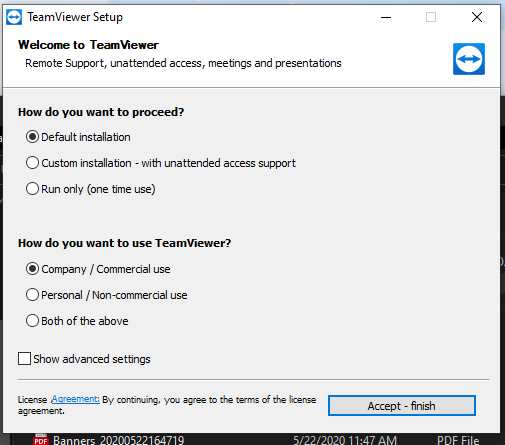
You should see a setup file begin to download. Once complete, you’ll want to RUN the TeamViewerSetup.exeThe radio buttons here will default to a Default Installation and Company/Commercial, so you should be able to just click Accept-Finish.Once it’s done, TeamViewer should automatically pop up on your screen. If not, you may need to double-click the TeamViewer icon that’s now on your desktop. Once TeamViewer is running, just provide your OME Service Tech with “Your ID” and “Password” and we’ll be able to remote into your PC and help with any issues or questions you may have with Quadient Software Products.
Learn how to print from your iPhone or iPad to an AirPrint-enabled printer.
Before you begin
Confirm that your printer supports AirPrint. Contact your printer’s manufacturer for details.
Make sure that your iPhone or iPad and your printer are connected to the same Wi-Fi network and that you’re within range.
Print with AirPrint
Open the app that you want to print from.
To find the print option, tap the app’s Share button or or the Actions button.
Scroll down and tap the Print button or Print. If you can’t find the print option, check the app’s User Guide or Help section. Not all apps support AirPrint.
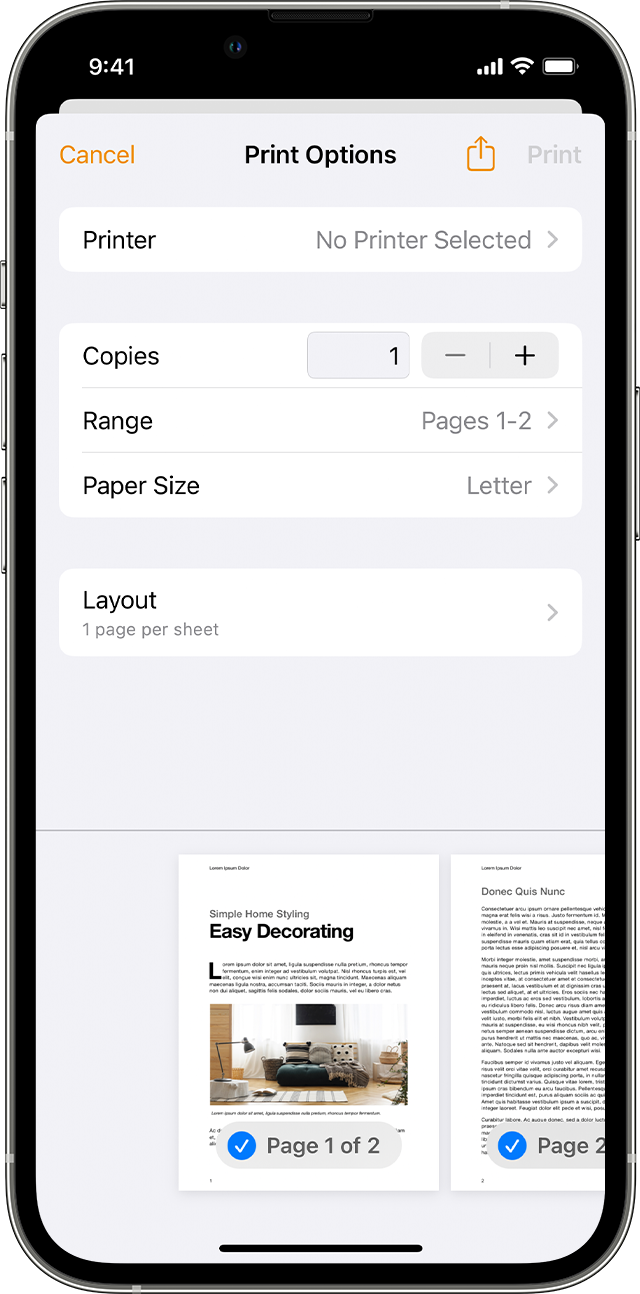
Tap No Printer Selected and choose an AirPrint-enabled printer.
Choose the number of copies or other options, like which pages you want to print.
Tap Print in the upper-right corner.
View or cancel your print job
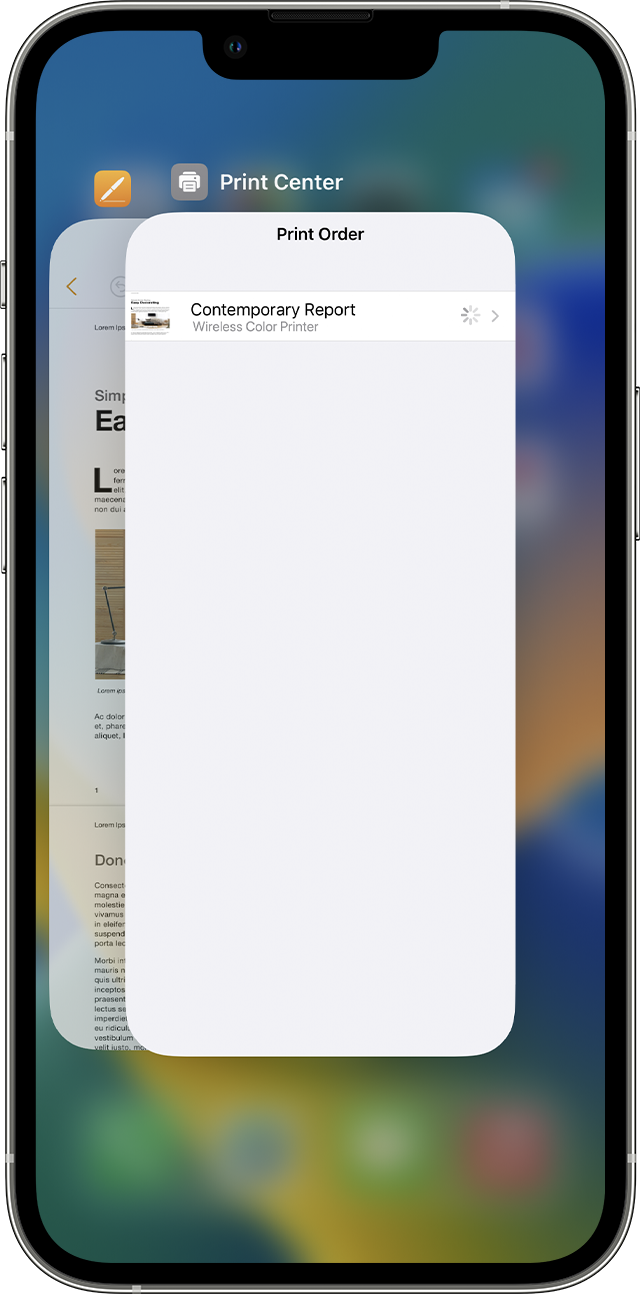
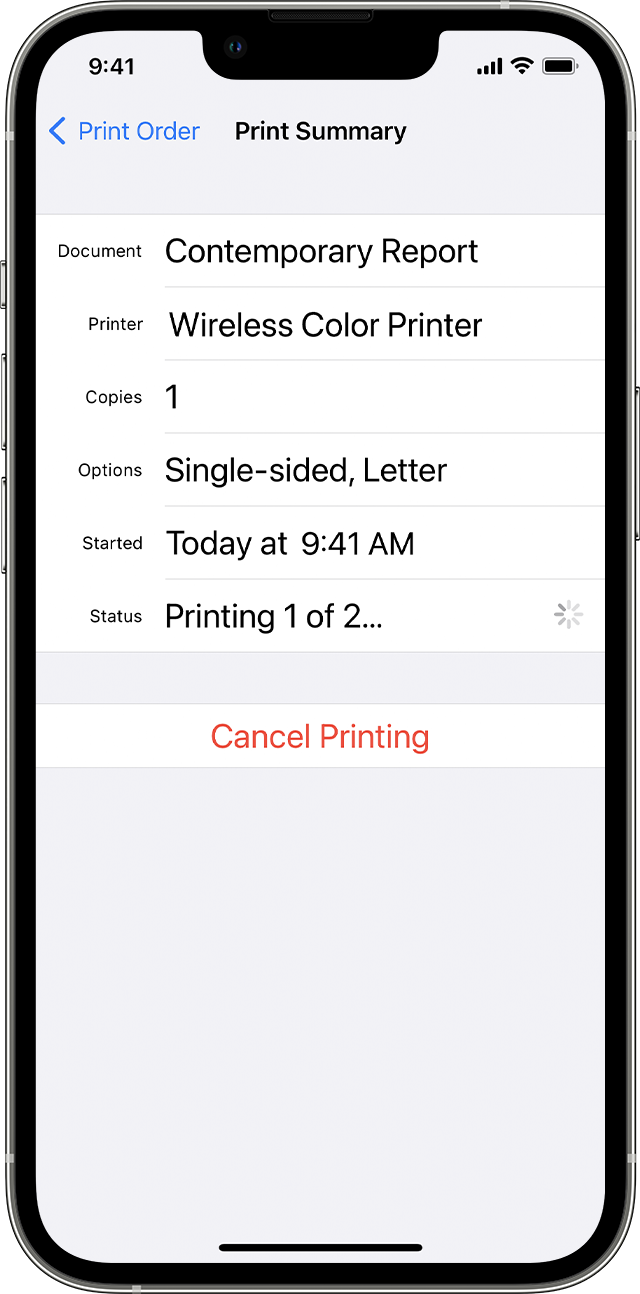
While printing, you can view your print jobs or cancel them through the App Switcher.
To cancel a print job, open the App Switcher, tap Print Center, then tap Cancel Printing.
AirPrint works with Wi-Fi or wired network connections. AirPrint devices connected to the USB port of an Apple AirPort Base Station or AirPort Time Capsule, or to your computer using Bluetooth connection, can’t use AirPrint.
Information about products not manufactured by Apple, or independent websites not controlled or tested by Apple, is provided without recommendation or endorsement. Apple assumes no responsibility with regard to the selection, performance, or use of third-party websites or products. Apple makes no representations regarding third-party website accuracy or reliability. Contact the vendor for additional information.
Preparing certified mail the traditional way requires filling out PS Form 3800 by hand and attaching it to the front of your envelope. Then, you would need to peel off the tracking number and attach it to the corresponding green card which would get attached to the back of the envelope. This process is time-consuming, tedious, and error-prone. e-Certify replaces PS Form 3800 with a clean, printed banner page that is displayed in a window envelope or a simple thermal label that is affixed to the front.
Your new, streamlined proof of delivery
Just like PS Form 3800, manually filling out the green card, also referred to as PS Form 3811, is cumbersome and tedious. After delivery, the sender must wait for the green card to be returned, and the risk of it getting lost in the mail stream is a threat to security and could have legal consequences. The electronic return receipt solves all these issues and carries the same legal status as the green card. With e-Certify, you’ll receive an email notification with the electronic return receipt attached as a PDF upon delivery of the mail piece. Your electronic return receipts are stored securely in e-Certify, available for you to view and download at any time, from anywhere.
After purchasing e-Certify, you will receive a welcome email from ConnectSuite that includes your default username and password. Use this information to sign in to e-Certify here.
Upon signing in, you will be greeted with the e-Certify homepage. Learn more about the parts of the Homepage.
Step 2: Create additional users (optional)
You can create additional users to allow others to use e-Certify and create mail pieces.
Use the right navigation bar to navigate to the Users page.
The Tracking Labels page allows you to customize the layout of your banner pages and thermal labels with a high level of flexibility and functionality. We provide six default tracking labels based on the most popular types of envelopes and labels. However, if you would like to customize your own, you can do so.
Use the right navigation bar to navigate to the Tracking Labels page.
To create a new tracking label, click New Tracking Label.
At the heart of e-Certify, the mailing profile integrates your organization’s mailing needs with the USPS. When creating a mail piece, you will need to select a mailing profile to use. This auto-populates a number of fields and speeds up your workflow.
Use the right navigation bar to navigate to the Mailing Profiles page.
To create a new mailing profile, click New Mailing Profile.
After the simple setup is complete, you are ready to create a mail piece.
Navigate to Create Tracking: To create a mail piece, open the left navigation bar and select Create Tracking.
Select A Profile: Select a mailing profile to use for the mail piece. This will auto-populate a number of fields on this page and speed up your workflow.
Add Recipient Address: Enter an address into the Name/Address Block. You can click Validate Address to ensure USPS compliant formatting based on USPS standards. If you manually entered an address, you can select Add to My Address Book to save the address to your address book.
Calculate Postage: Estimate the postage required for your piece. Note that this is only an estimate and doesn’t need to be exact.
The Envelope Type field will be auto-populated according to your mailing profile selection, but can be edited.
Select a method for calculating postage, and then enter the appropriate page count, weight, or postage.
Custom Fields: Here, you have the option to add custom fields. These are variable fields associated with the mail piece that help with mail piece search and identification. Depending on your settings for custom fields in various places, these fields may be auto-populated.
Additional Settings: All of these fields will be auto-populated according to your mailing profile selection. Depending on the configuration of the selected mailing profile, some fields may or may not be editable.
The Tracking Label, Departments, and Locations fields will all be auto-populated according to your mailing profile selection and will always be editable.
Email Notifications: Configure email notifications for the piece. Depending on the configuration of the selected mailing profile, these fields may or may not be editable. Select Proof of Acceptance Email to receive an email with the POA attached when the USPS accepts the mail piece. Select Proof of Delivery Email to receive an email with the POD attached after the mail piece is delivered and signed for.
Extra Services: Select the extra services you would like with the mail piece. Depending on the configuration of the selected mailing profile, these fields may or may not be editable.
Save your mail piece: When you’re done, click Save. Or, if you want to create another piece with all of the exact same selections and settings but a new recipient address, click Save and Create Similar.
After mail pieces are created and saved, they are placed in your Mail Queue.
Open and print the banner page for your mail piece by clicking the paper icon to the right of it. Or, select the checkbox next to the piece and click Download Banner Pages.
Fold and insert the banner page into your window envelope.
Step 3: Submit your mail piece to the USPS
Before actually entering your mail piece into the mail stream, it is crucial to first submit it to the USPS. To do this, select the checkbox next to the piece, then click Submit Pieces to the USPS. This does three important things:
It lets the USPS know the mail piece is coming.
It generates the USPS paperwork for the mail piece, including the Firm Mailing Book for Accountable Mail (PS Form 3877) and SCAN Form (PS Form 5630).
It allows tracking and electronic return receipt data to be returned and retrievable in e-Certify.
Upon submitting your piece to the USPS, you will be taken to a confirmation page where you can download the completed PS Form 3877 or PS Form 5630.
Your mail piece is now ready to be entered into the mail stream.
After your mail piece has been delivered and signed for, you will want to access the electronic return receipt, also referred to as the proof of delivery (POD) or signature file. If selected during mail piece creation, you will receive an email notification with the POD attached after your mail piece has been delivered and signed for. In addition, the POD will be made available to view and download in e-Certify.
Use the left navigation bar to navigate to the Piece Search page.
To view the POD for your mail piece, click the paper icon to the right of it.
To create a batch of mail pieces by uploading a file, navigate to the Mail Queue, then click Upload File.
Choose File: The file to be uploaded must be saved as a CSV or TSV file. You can download the appropriate sample file according to your format for entering a recipient address below. Note that the default format is Address block, and this setting can be adjusted in your Company settings.
Address block: A sample file for this format can be downloadedhere. The name of the sample file is cm_ab_sample.
Deliver as addressed: A sample file for this format can be downloadedhere. The name of the sample file is cm_dad_sample.
Preparing your file:
Use as many of the address columns as needed.
Choose either the weight column or the postage column to enter a value for estimating postage. If the weight column is used, enter the weight of the piece in ounces. If the postage column is used, enter the amount of postage required for the piece excluding extra services.
The custom field, retrefnum, and notificationemail columns are optional.
Use the notificationemail column if you would like to specify an email address to be used for email notifications. To send email notifications to multiple email addresses, separate them with a semicolon. If this column is left blank, notifications will be sent to the notification email of the user who uploaded the file.
Profile: Select a mailing profile to be used for all mail pieces in the batch.